> ## Documentation Index
> Fetch the complete documentation index at: https://docs-dev-fix-docs-5525.mintlify.site/llms.txt
> Use this file to discover all available pages before exploring further.
# Coffre-fort
> Décrit comment utiliser le coffre-fort de formulaires pour les actions.
Le coffre-fort vous permet de stocker de manière sécurisée des secrets ou des paramètres courants (par exemple : clés API, jetons d’accès, jetons d’actualisation) pour authentifier les demandes auprès de services externes ou des intégrations en tant que connexions de coffre-fort.
* Certaines connexions exigent que l’utilisateur fournisse des informations d’identification (par exemple, dans le cas d’une connexion Auth0 avec une application machine-machine (M-M), un jeton d’accès est généré avec un délai d’expiration et un jeton d’actualisation). La connexion stocke les deux jetons et génère un nouveau jeton d’accès avant son expiration.
* Certains services externes requièrent des permissions pour générer des identifiants d’API. Si vous modifiez les permissions, mettez à jour la connexion à ces services pour éviter les problèmes de connexion.
* Une fois la connexion ajoutée, vous pouvez l’utiliser dans vos flux. Toute mise à jour d’une connexion existante se propage automatiquement.
## Créer et modifier des connexions au coffre-fort
Créez et modifiez des connexions au coffre-fort depuis la page correspondante ou l’éditeur de flux lorsqu’une action nécessite des identifiants.
### Créer des connexions au coffre-fort depuis la page correspondante
Ajoutez une connexion au coffre-fort depuis la page Coffre-fort en procédant comme suit :
1. Ouvrez l’éditeur de formulaires en sélectionnant **Auth0 Dashboard > Actions > Forms (Formulaires).**
2. En haut à gauche de l’écran, sélectionnez **{"{tenantName}"} > Vault (Coffre-fort)** pour ouvrir la page Vault.
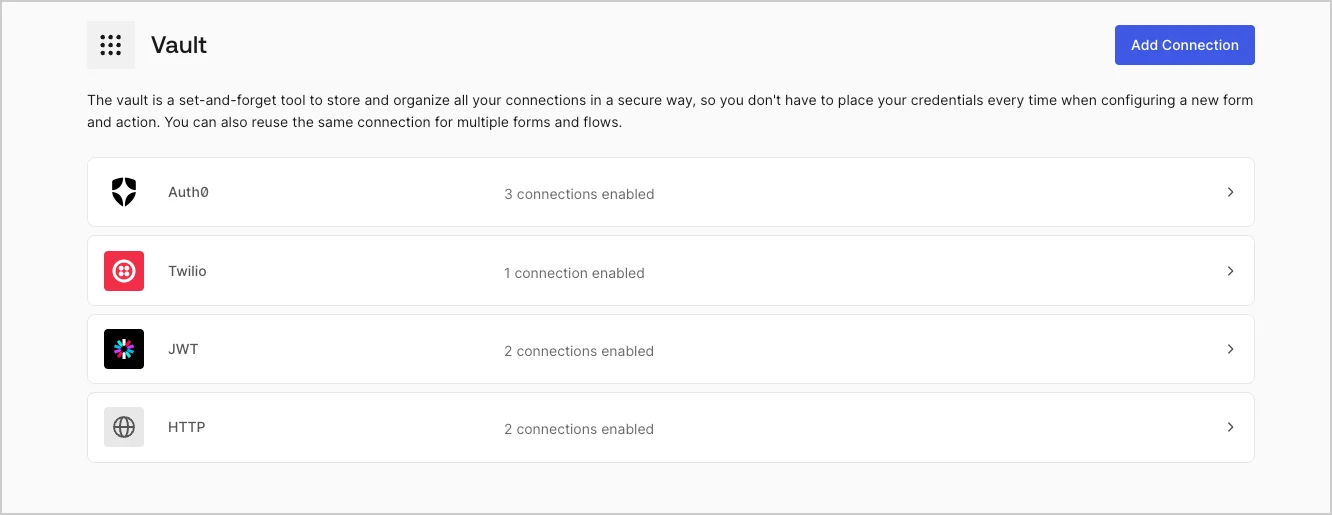 3. Sélectionnez **Add Vault Connection (Ajouter une connexion au coffre-fort)**.
4. Sélectionnez l’action désirée, puis **Continue (Continuer)**.
5. Ajoutez un **Connection name (Nom de connexion)** au coffre-fort et sélectionnez **Continue (Continuer)**.
6. Saisissez les identifiants.
Si vous n’avez pas d’identifiants précis, vous pouvez sélectionner **Create an empty connection (Créer une connexion vide)** et ajouter les identifiants plus tard. Les connexions vides affichent une icône orange qui indiquent l’absence d’identifiants.
7. Sélectionnez **Add Vault Connection (Ajouter une connexion au coffre-fort)**.
### Créer des connexions au coffre-fort depuis l’éditeur de flux
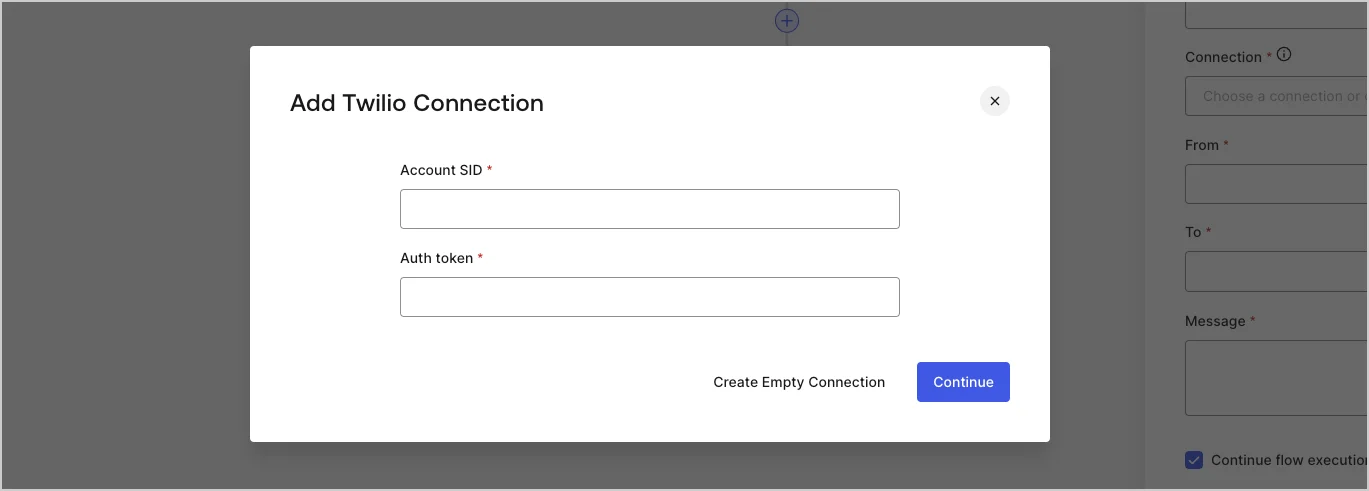
Ajoutez une connexion au coffre-fort à partir d’une action de flux, par exemple, Twilio, en procédant comme suit :
1. Ouvrez l’éditeur de flux en sélectionnant **Auth0 Dashboard > Actions > Forms (Formulaires) > Flows (Flux)**
2. Sélectionnez un flux et ajoutez une action **Send SMS with Twilio (Envoyer un SMS avec Twilio)**.
3. Dans le paramètre **Vault connection (Connexion au coffre-fort)** de l’action, sélectionnez l’icône **+**.
3. Sélectionnez **Add Vault Connection (Ajouter une connexion au coffre-fort)**.
4. Sélectionnez l’action désirée, puis **Continue (Continuer)**.
5. Ajoutez un **Connection name (Nom de connexion)** au coffre-fort et sélectionnez **Continue (Continuer)**.
6. Saisissez les identifiants.
Si vous n’avez pas d’identifiants précis, vous pouvez sélectionner **Create an empty connection (Créer une connexion vide)** et ajouter les identifiants plus tard. Les connexions vides affichent une icône orange qui indiquent l’absence d’identifiants.
7. Sélectionnez **Add Vault Connection (Ajouter une connexion au coffre-fort)**.
### Créer des connexions au coffre-fort depuis l’éditeur de flux
Ajoutez une connexion au coffre-fort à partir d’une action de flux, par exemple, Twilio, en procédant comme suit :
1. Ouvrez l’éditeur de flux en sélectionnant **Auth0 Dashboard > Actions > Forms (Formulaires) > Flows (Flux)**
2. Sélectionnez un flux et ajoutez une action **Send SMS with Twilio (Envoyer un SMS avec Twilio)**.
3. Dans le paramètre **Vault connection (Connexion au coffre-fort)** de l’action, sélectionnez l’icône **+**.
 4. Ajoutez un **Connection name (Nom de connexion)** au coffre-fort et sélectionnez **Continue (Continuer)**.
5. Saisissez les identifiants.
Si vous n’avez pas d’identifiants précis, vous pouvez sélectionner **Create an empty connection (Créer une connexion vide)** et ajouter les identifiants plus tard. Les connexions vides affichent une icône orange qui indiquent l’absence d’identifiants.
4. Ajoutez un **Connection name (Nom de connexion)** au coffre-fort et sélectionnez **Continue (Continuer)**.
5. Saisissez les identifiants.
Si vous n’avez pas d’identifiants précis, vous pouvez sélectionner **Create an empty connection (Créer une connexion vide)** et ajouter les identifiants plus tard. Les connexions vides affichent une icône orange qui indiquent l’absence d’identifiants.
 6. Sélectionnez **Add Vault Connection (Ajouter une connexion au coffre-fort)**.